Pages

Sunday, 27 October 2013

Some pictures

My brother is a great photographer, and he has been so kind to take a few picture of me and some of my axes. Here is an excerpt of that collection. All self-explanatory really. :-)

 The woodshed at my uncles place where I sat down to work.

Me at work on the handle.

My beautiful, trusty hatchet.

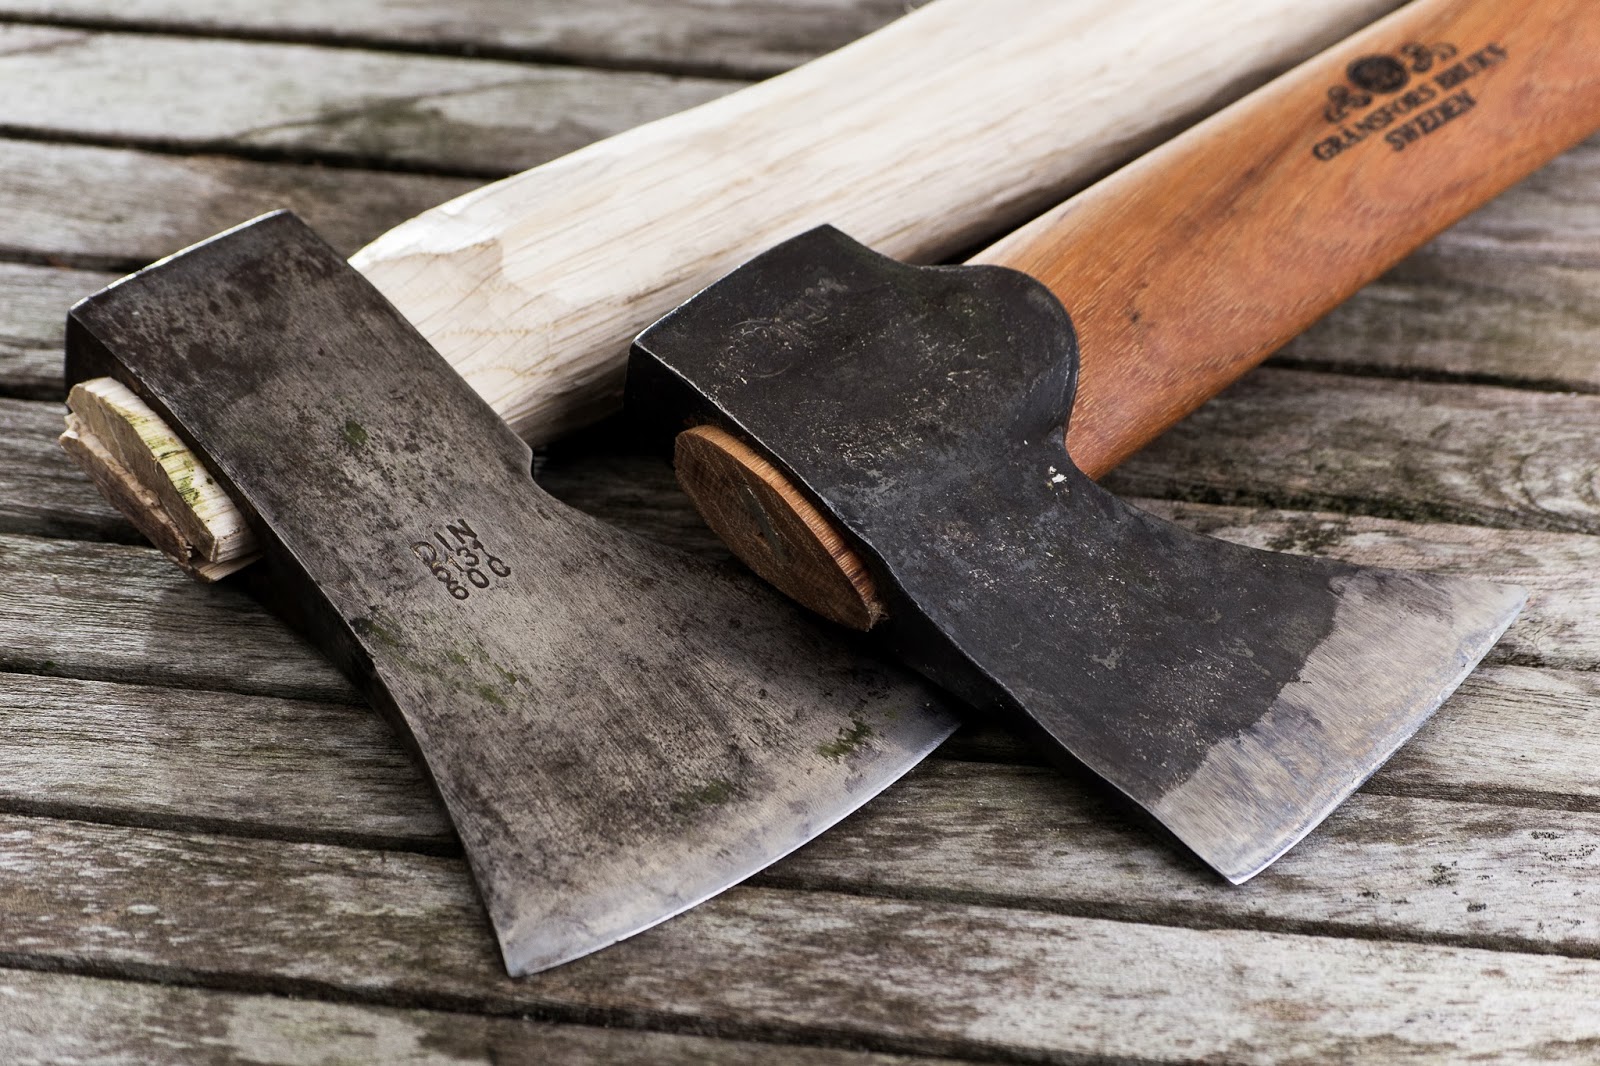
And now both my beautiful trusted hatchets.


The handle turned out ok, be it a bit thick. I might thin it down a lot, and change the grind on the bit, but for now I`ll leave it as is and see it as my old camping-hatchet. Primarily used for splitting stuff.

An old friend and applewood.

Last weekend I did something that I should have done earlier. I brought my very first hatchet back to life. I bought this axe nearly 10 years ago now. It had been witout a handle for some time, but now it is back in business. I made a handle for it from an oaken branch that has been cut over a year ago, but was stored outside and off the ground. It was not as dry as I hoped for, but I think it will hold up. If it shrinks enough to come loose I`ll simply cut a larger wedge and try again. Today I used it to carve two spoons from fresh apple wood. I found out that the grind is far from perfect for carving. I might fix this some day, but for now I think I`ll just keep it as my camping-hatchet. After all, that is why I bought it all those years ago.


I made a large cooking spoon and a teaspoon. Both need more work but I`ll do that in a few days time, when the wood has dried a bit. It is very fibrous and tears out easily. The large spoon will be a present for my uncle, who left the wood for me to carve instead of burning it.

Tuesday, 15 October 2013

Racking the plumwine

Last weekend I reckoned it was time to rack the plumwine. The fermentation has stopped. The water in the waterlock has been level for a bit more than a week, and there was layer of sediment at the bottom of the flask. I assume that now the fermenting has come to an end the next objective is to clear the wine, and that all we can do to achieve is wait and rack the wine into a clean container every few months. So, here is what I did:
Carefully, not disturbing the sediment, place the demijohn on a high surface. Have another sterile container ready to rack the wine into. I used one of my food-grade buckets. Take a tube, hang one end in the wine, and suck the wine through untill it starts flowing. I love this principle of transporting fluids. When the wine flows it is a matter of waiting. With the last bit you have to be careful to not suck up the sediment. Tilt the demijohn to get as much wine as you can.

 When all the wine is out, clean the demijohn, pour the wine back in, put the waterlock back on and wait again for a month or two.

I got to taste a sip of the wine when I sucked it through the tube, and was very pleasantly surprised. It is mildly sweet and the plum-taste is very nice. I can`t wait for this stuff to be done so I can enjoy a glass.

Saturday, 12 October 2013

Hawthorn kuksa #2.

I enjoy carving kuksa-style cups. They take more effort than spoons, but the outcome is satisfying. This far I have carved four, but the latest one is maybe the first one that approaches the right size.


Compared to the kuksas I did earlier I think I am slowly improving. In the next picture you see my first, third and latest. The second I have given away to a fellow student at school. I hope I`ll find some more wood in the right sizes soon, because this hawthorn is slowly becomming a bit rough on the edges. Also, I do not have much left that is suitable for carving.

Tuesday, 8 October 2013

The brew goes on.


The demijohns have been blurping away nicely the past weeks, and now they have calmed down a bit. Over the first weeks they bubbled constantly, and you could see the liquid in the flasks buzzing and swirling. Now the plumwine seems to have come to a stop, while the elderberry port bubbles on very slowly. It is interesting to see how the colours of the brews have changed over time. My pictures are a poor approach of reality and do not quite show this, but especially the plum wine has changed colour from a dark purple to a nice orange. It`ll continue to become lighter as it clears over time I assume. I am not entirely certain on how to proceed with the wine, because I thought the fermenting would not stop this quick. I suppose I`ll rack it, clean the flask and put it back in there for some weeks. Then I`ll rack and bottle. For the port I`ll just wait a week or two after it stopped bubbling and then I`ll rack and bottle.

Thursday, 26 September 2013

Crooked

After all my brewing escapades and other things that have been going on here, I came back to the tools again. Wood-selection was a bit tricky, because all the good hawthorn is gone. I have some crooked bits left, and I was saving the one fine chunk I have for kuksas. I now have some gnarly pieces with twisted grain to work with, and not in every piece there is a spoon. Sometimes you see it right away, and sometimes you find that out when a piece unexpectedly splits or just turns out to be a right pain to carve. Today I had a go at a small crooked spoon.


The edges of this bit of wood splintered rather easy, and this hawthorn is getting harder as well. I have seen some people felling poplar earlier this week, and I might just drop by the site to see if I can get my hands on some.

Sunday, 22 September 2013

The Plum-Project. Part 3 - Wine

This will be a write-up covering my first experience in the fascinating craft of brewing. It is by no means intended as a tutorial. It will simply cover what I have done, why I did it, and eventually how it turned out.


First I weighed out 3 kilograms of plums, and washed them under hot water. Then I transferred them to a food-grade bucket. I got my buckets from a snackbar franchise in the Netherlands. They get their sauces delivered in them and afterwards have no need for them. The good thing about these buckets, besides the lid, is that they are made of polypropyl, as opposed to the PVC that household buckets are made from. The PVC has a tendency to release chloride into your product. The bucket should be well sterilized before use. I do this by soaking them in a bleach-solution for a bit, and then rinse them very well. 

After I had a sterile bucket I put four liters of water on the stove to let it boil. While that was going on I began the noble task of crushing the plums with a potato-masher. This turned out to be no easy task, and I found out it is better to wait with this untill you poured some boiling water on them.


While crushing the fruit you have to be careful to not crush the stones as this will affect the flavour later. Once this mix is cooled down I added about 8 grams of pectinase, a pectin degrading enzyme, and let is stand around at room temperature for 24 hours. The pectinase degrades the cell-walls in the plums and this increases the amount of juice and therefore flavour you can get from them. 
After 24 hours (well, it might have been about 32) it was time to strain the liquid. I had my sister here to help, and that was very nice because holding stuff in place while pouring liquids through isn`t so easy while alone. We strained the fruit out of the liquid (that would at be called 'most') and pressed as much out as we could. A nice dirty job. 

 The most we boiled up, and once it was boiling we dissolved 1700 grams of sugar in it. This whole mix went back into a sterile bucket to cool down.

Once the most has cooled down, which takes quite some time, it is time to start the yeast. I mixed a good teaspoon full of yeast in about 2 dL of organge juice. If it goes frothy this proves that the yeast-cells are active. Leave this for 10 minutes or so. 
 The cooled down most still had quite some particles and stuff in it, so before I put it in the demijohn I strained it through a clean tea towel, yet again into a sterie bucket. After that I poured it into the sterilized demijohn using a funnel, and then added the yeast. In hindsight I could better have done this in the opposite order, as that would have mixed the yeast through the most better.

 In this picture, taken just after I put the airlock on the bottle, you can see that the yeast floats through the most in little clumps. Now, after a few days of bubbling the colour of the wine changed a lot, and all the clumps have disappeared. One day after the plum-wine was in its flask bubbling away I also started a batch of elderberry-port. I followed this recipe for that: http://www.bushcraftuk.com/forum/showthread.php?t=60997&highlight=. It is a very clear tutorial made by a man who knows his buisness very well. Here are my projects side by side. I left some head-space in the port-bottle, because the man who made the tutorial says it will have a violent first fermentation. When things calm down a bit I`ll add the last bit of most that I am now keeping in the fridge in a clean coke-bottle.

I have really enjoyed my first ventures into the brewing-world. It is very satisfying to just look at the bottles bubbling away every now and then. It is so alive in there! For now the bottles are standing isolated from the ground and in a bucket. If things decide to become violent in there this will avoid a great mess.