Pages

Thursday 29 August 2013

Sheath making.

Since I remain woodless for some time more I find refuge in making other things than spoons. Still sharps-related I started on a project that I have been wanting to do for a long time. A long time ago I rehandled a mora 711 using a norwegian 5 NOK coin and a bit of oak. The motivation to get into knife-making again came from a competition on bushcraftUK.com. To be able to enter the knife that I made for that, it needed a sheath. I made one from an old leather purse. It is bound together with a leather lace and this worked surprisingly well.


Sunday 25 August 2013

Knife

Here are some more photos of the knife i made yesterday. I tried it today on some of the firewood they have here one the family birthday I am on. Unfortunately this is great firewood, which makes it bad carvingwood. Rockhard and bonedry. Without a good choppingbock it was difficult to work. To test the knife i made some feathersticks. I already knew the blade is ok, but now i know that the handle is sound as well. I seriously need to make myself do leatherwork next week to make some sheaths for knives i have lying around at home. And I need to find wood.

Terrible lack of wood

I can`t find spoonwood! I have been without wood to carve for over a week now. Not making anything was getting on my nerves so I set out on a different project. Making myself a new carving knife. The knife I have mainly used for a long time now is a Mora 711 that I rehandles in oak. It is really nice to use but I find the blade a bit large at times. I do like the size of the 511, and therefore set out to rehandle one of those. Naturally, now that I write this blog-post I do not have it at hand to take proper pictures, so this will have to suffice for now:

The handle is oak, with black leather spacers and an icelandic 10kr coin as a bolster. I`ll testrun it tomorrow when we`ll go visit some family who usually have greenish wood lying around. I`ll take better pictures then, and also hope to have carved a spoon and scored some new wood by then. I haven`t carved anything for way too long now.

Tuesday 13 August 2013

Home sweet home.

Yesterday I came back home after my fantastic time in Norway. I had been away for quite a while and getting home to my own room after roaming the rough nature in the North always takes getting used to. While away I had space to carve outside, a good supply of green wood to use and the sound of my axe cheerfully hewing away bothered nobody. All these things are quite different now that I am home where I carve in my room in a flat. I can`t use the axe too long per day, and green wood is rather tricky to come by. Nevertheless I am going out to source some fresh wood soon. There are loads of techniques and shapes I want to try. Here are family-photos of all the spoons I took home from norway.


The large spoon second from the right has a bowl that is stained by the raspberry-jam I made with it.


The soft pink colour of the raspberries has stained the grain in a fantastic way. I find it really difficult to capture it well enough to do it justice (my picture skills sure do need improvement) but you can kind of see it here:

Now I wonder if there are methods to stain wood this way in food-safe colours that do not involve boiling the wood in berries. I`ll have to research that. For now I need to find me some wood first though. Failing that I`ll throw my efforts on kolrosing some treen that I already have. Time to adjust back to 'normal life'.

Thursday 8 August 2013

Kolrosing

Kolrosing is a wood-decoration method that does not actually remove wood from the decorated object. I tried to do it before, but I had missed a vital bit of information regarding the process. Thanks to bcUK again I found out what it was that I did wrong. Here is how I now do it, in remarkably bad pictures.

First draw out a design, using a soft pencil.

Then, with the tip of a sharp knife, make incisions on the lines. I use the tip of my mora 120 carving knife, and hold it like a pencil. This works quite well.                                

After incising all the lines a colouring powder is rubbed in. Traditionally this was coal, or powdered innerbark. Nowadays people use fine ground coffee or cinnamon powder more often. I use cinnamon here. I have tried using cocoa-powder but that stained the surrounding wood quite a bit as well.

 And now for the important bit: Rub oil onto the kolrosed object. This locks the powder into place and blends out the remains of the pencil.

This is quite a foolproof way to decorate wooden objects. I have seen wonderful intricate patterns as well as fantastic flowers and curly decorations on objects. It is something that I`ll be practicing, because sometimes a little decoration can be just what an otherwise boring utensil needs.


Tuesday 6 August 2013

Birch spoon


Today I carved a spoon in birch. There isn`t an awful lot to tell about it. It is a simple spoon with a bit of a crank and can be used for stirring and serving alike. Besides the triangle-like shape I put in the back of the bowl it is a boring but sturdy spoon that should be able to take a bit of a beating in a well-used kitchen.


Saturday 3 August 2013

Finally a 'good' one after the holiday

So after my recent travel to Iceland (which was absolutely fantastic) I got back to the choppingblock. It seemed though, that I was only able to produce rubbish this week, if I managed not to break the workpiece in the proces. Today I figured I would do something about that, and instead of furiously chop on the next piece in frustration I slowed down. I decided I wanted to make a large cooking spoon with a curved but not cranked handle. This mainly because I didn`t feel up to succesfully creating a crank today. Anyhow, I selected some willow, stropped my tools and most importantly: I dug up my pencil from my carving kit for the first time in a while. Here is the 'slow-down-Daniƫl'-spoon.
 The tool-finish in the bowl is not really good. I have to take the time to sharpen my spoon hook.
Front view

Back view

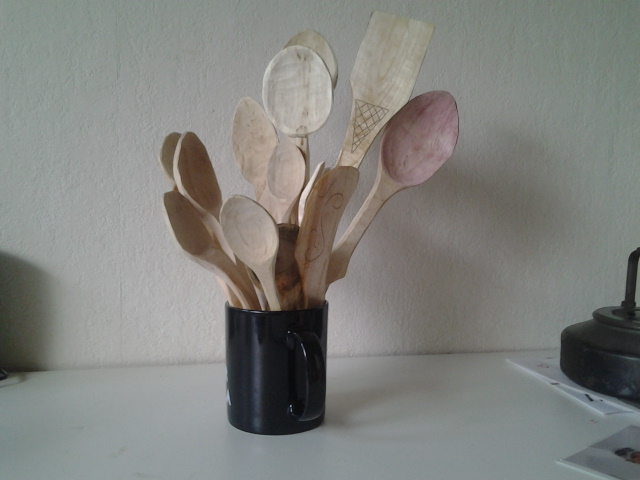
Here are the items that I haven`t gotten right for some reason. The coffeeschoop is quite cranked, but I could not get the bowl right. The wood was really soft and teared easily, most likely caused by the heavy spalting. I didn`t dare to go thinner because of that, but I can`t get it even either.
 The spoon in this picture has a bad bowl-shape and the finish isn`t good. I started with a thin bit of wood and it turned out that to get all the uneven bits from splitting out I nearly had to cut it in half. The spatula is a bit better. I had given up on symmetry for the day though, it seems.
These three items (and many more that didn`t survive at all) have been made with the 'I`ll see where I'll end up'-attitude. It turns out that just like with travelling, a bit of planning can make your experience a lot more pleasant.